


Different brand derailleurs all have subtle differences but the basic components are all the same. In this article we show you how to tune your gears. Adjust your limit screws, tension your gear cables, and get your rear gears working nice and accurately.
Tools required:
Phillips head screwdriver
5mm Allen Key

1. This process is best done with the bike suspended or held in a Work stand so the pedals and wheel can rotate freely in a forward motion. Before making any adjustments, inspect the Rear Derailleur for any signs of excessive wear to the pulley/jockey wheels and make to sure the mechanism isn’t bent.
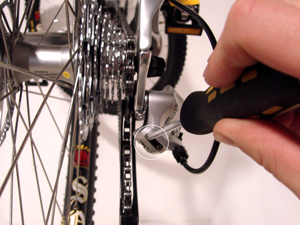
Image 1
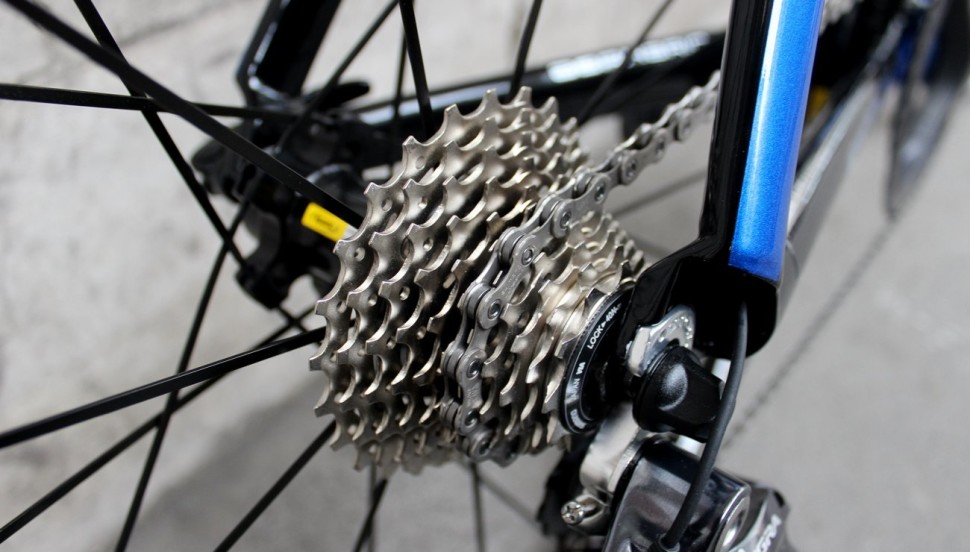
2. To limit the movement of the rear Derailleur so that it doesn’t shift into the chain stay, you’ll need to use the upper limit screw (H) located on the back of the Derailleur body. Turning this screw clockwise moves the top jockey wheel to the left, and turning it anti-clockwise moves it to the right. Shift the rear derailleur into the smallest sprocket and adjust it until the center line of the top jockey wheel is in-line with the smallest sprocket. (Image 1)

Image 2
3. The low adjustment will stop the chain from over-shifting beyond the largest sprocket and causing the chain to jump into the spokes of the rear wheel. Turning the lower limit screw (L) clockwise to will move the top jockey wheel to the right, and anti-clockwise will move it to the left. Shift the rear derailleur into the largest sprocket and adjust the screw until the center line of the top jockey wheel is directly in-line with the largest sprocket. (Image 2)

Image 3
4. The B-tension screw sets the vertical distance between the top jockey wheel and the smaller sprockets. A smaller distance makes the shifting snappier. To adjust, turn the B-tension screw clockwise to move the jockey wheel higher up and anti-clockwise to drop it down. With the chain on the smallest chain ring at the front and the largest sprocket at the rear, set the screw so the top jockey wheel is as close to the sprocket as possible, without contacting. (Image 3)
5. Check that it clears the sprocket all the way through the cassette.

Image 4
6. To adjust the derailleur cable tension, shift the chain to the middle chain ring on the front and smallest sprocket on the rear, and try to shift on to the second sprocket. If it doesn’t quite make it there, rotate the barrel adjuster on the derailleur anti-clockwise to increase the cable tension (Image 4). If it over-shifts and tries to get onto the third sprocket, turn the adjuster clockwise to decrease the cable tension. When it works between one and two, check the shifting across the rest of the gears and tweak the adjuster if necessary.
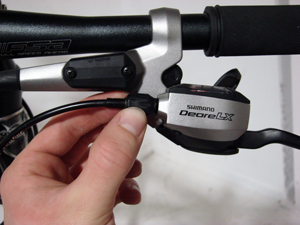
Image 5
7. After installing new inner cable, you’ll find that it stretches and loses tension after it’s first period of use. You’ll notice that the gears move slightly out of adjustment and will begin to hesitate or over-shift. To fix this; you will need to remove the slack from the cable using the barrel adjustment on the shifter, or repeat Step 4. This works identical to the adjuster on the rear derailleur. If there is lots of slack in the cable and cannot be taken up using the barrel adjuster, you will need to use the anchor bolt on the rear derailleur. Using the 5mm Allen Key, loosen the bolt clamping the cable and pull the cable through using a pair pliers of Cable Pullers.
8. Once the cable tension is taught, tighten the anchor bolt firmly. Now test the gears to check they shift smoothly and accurately. If tension is still not correct, repeat step 6.
AUTHOR

Danielle Conwell
Marketing - Torpedo7