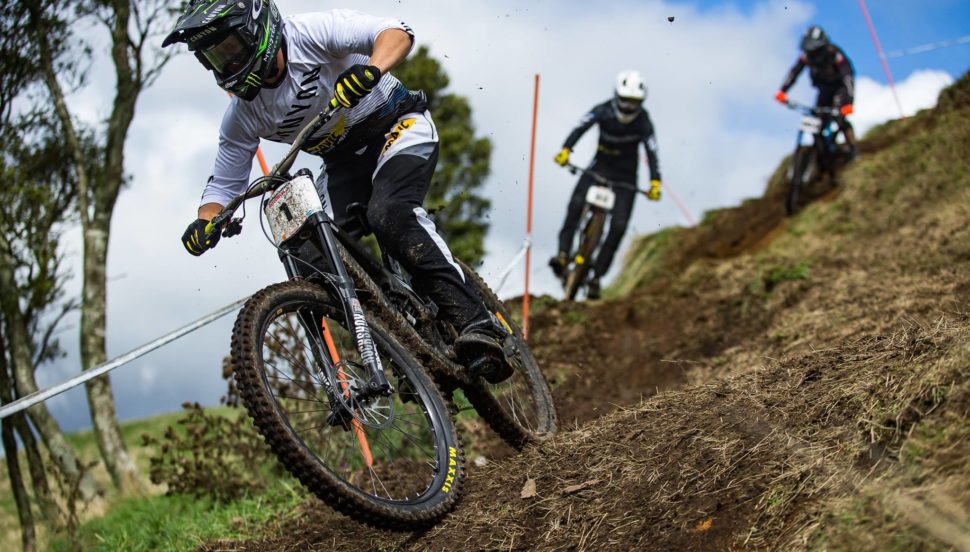
Backcountry mountain biking allows people to enjoy the technical challenges of riding while seeing large areas of New Zealand’s backcountry in a shorter time span. Every trip into the backcountry has an inherent degree of risk, which can be easily reduced through careful planning and good decision making. It doesn’t take long to plan. Use this guide to help you.
1. Plan your ride
Planning a ride in the backcountry is different to visiting a bike park. If you get into trouble, the walk home can be significant. To increase the chances of a positive and enjoyable trip it’s wise to consider the capabilities of everyone in the group and ensure you have the right gear, skills and expectation.
Who are you going with?
The first thing you need to consider is who you are going with.
• Group Size – If you are planning to ride solo, you’ll need to carefully consider how this changes your approach to preparing for the ride. How will you signal for help if you need it? If you’re riding with others ensure they are all involved in the planning.
• Experience – How experienced and fit is each person? Make sure everyone in your group is physically fit enough to enjoy the ride. The trip time can also change depending on the abilities of your group. Is the track too technical for some of the riders? Will long stretches have to be walked by some members, is there time?
• Medical Conditions – Does anyone have any pre-existing medical conditions? This is a really important thing to know, partly to make sure each person can cope with the ride, and partly to know how to deal with any medical situations that may arise while you’re out.
• Trip Style – What does each person want from the ride? Extremely technical descents are a great challenge for some but it won’t be everyone’s idea of fun. Make sure you all have the same expectations and plan a ride to meet those expectations.
• Gear – Does everyone have what they need? Make sure you have the appropriate clothing and equipment for the track, terrain and weather. See the Take Sufficient Supplies section for more information.
Where are you going?
Next, consider the location. Start by getting advice from people who have been there before and looking at the map in detail. You’ll also need to check what your hut or campsite provides so you know what else to bring.
• Trail guides exist for many rides around New Zealand. There are both online and offline options. The Kennett brothers have probably been there before, so check out their guides at www.kennett.co.nz. You can also check out websites such as www.trailforks.com and www.nzcycletrail.com. Understand the track grades and how you and your group relate to them.
• Department of Conservation (DOC) has a wealth of knowledge about tracks and important things to know about the areas you’re going. You may also need to book a hut with them if planning a multiday ride. Pop into your nearest visitor centre or see www.doc.govt.nz
• Maps. There are a range of different maps available depending on the location of your ride and personal preference varies. Try www.topomap.co.nz, www.doc.govt.nz, www.trailforks.com, www.tracks.org.nz, www.nzcycletrail.com or the local council. If you’re not planning to ride an approved trail, you should check out if there is public access at www.wams.org.nz
How long will it take you?
Ensure you leave yourself enough time. Riding in the dark if you weren’t expecting to can quickly turn into an epic. Be sure to add a little more time than you think you’ll need.
What’s the terrain like? – Check a map and ask someone who knows the area. This will allow you to decide whether everyone in the group can cope with the terrain. A trip’s distance might look short on a map, but it could take much longer if it’s on a rough track or has a large elevation gain.
Are there any rivers you’ll need to cross? – Crossing a river with a bike is not an easy thing to do. Do you know how you’ll cross safely with a bike? If not, plan a route that has bridges.
Route options – Are there alternative route options if you need to change your plans? Make a note of evacuation options as you plan and also consider where the nearest help might be. You should also consider if there are any huts or shelters along the way if you need to find refuge.
Cellphone Reception – Mobile phones have limited coverage in most outdoor locations. You need to plan for what to do if something goes wrong and how you will call for help if you need it.
2. Tell someone your plans
Telling someone your plans is essential, no matter what or where the trip is. There’s always a chance that things could go wrong. If no one knows where you are it’ll be hard to find you if something goes wrong. Leaving your intentions with a trusted contact will significantly increase your chances of a safe return if you get injured or lost. And, ensure that everyone in the group knows the route. Stop and regroup often.
Who do you tell?
Tell your plans to someone you trust. A family member or a close friend is ideal for your trusted contact – you need to know they will act if you don’t return from your ride when you say you will. In some areas you may be able to leave your intentions with the trail trust as well.
What information should you leave?
Telling someone your plans is as simple as letting them know where you’re going and when you expect to be back. You should give them the information in the diagram below. You can write this down for them, or use the helpful online intentions process on the AdventureSmart website. This can be easily accessed on your mobile phone and is automatically emailed to your trusted contact once completed. www.adventuresmart.org.nz.
If you change your plans, let your contact know with a quick phone call or text on the day where possible. For example, someone might bring a friend or decide not to go, or you might decide to take a different track. If something does go wrong, it’s much better if people know exactly where to look and who they’re looking for.
3. Be aware of the weather
Knowing what the weather is likely to do on the day means you can pack the right gear or change your plans accordingly. New Zealand’s weather can change quickly so you need to be prepared for all conditions. The weather will often dramatically change the track conditions.
What is the forecast?
Checking the weather in New Zealand is easy. The MetService mobile apps and www.metservice.com are a great place to start. In the days leading up to your ride, use these planning tools:
- Severe Weather Information – Metservice’s Severe Weather Outlook is the first place to look for a heads-up on any severe weather expected beyond the next couple of days.
- Maps & Radars – The 3-day and 5-day rain forecasts are an indication of the timing of weather features expected over the next 5 days.
The day before and on the morning of your ride, re-check the expected conditions.
- Forecast – If your route is through a National Park, be sure to check the ‘Mountains & Parks’ forecast in addition to current Severe Weather Information (see below). If your route is closer to ‘Towns & Cities’, use those forecasts – but look for any warnings or watches indicated at the top of the page.
- Severe Weather Information – Current watches and warnings highlight severe weather around the country in the next 24-48 hours, but are primarily focused away from the mountains. If the weather looks serious, it would be wise to consider whether or not you should go on your ride.
What impact will the weather have on your ride?
If the weather forecast does change for the worse, you need to decide if it’s significant enough to alter your plans. You may want to think about either changing the day or time of your ride, or going to a different area that is less affected. Make sure you talk it through with everyone in the group, and consider everyone’s experience and comfort. In making your decisions, consider what effects these different weather conditions will have on your ride.
4. Know your limits
Considering the limits of yourself and the group means you can pick a ride that meets everyone’s expectations and fitness levels. It also means you are less likely to get into potentially dangerous situations beyond your experience and skill. Always be prepared to walk the bike, or turn around and alter your plans if things change.
Are you ready for this?
Good, fundamental skills are imperative to handling the trail.
- Start small. If you are new to trail riding, start with shorter routes and easier terrain and gradually build up to more technical and challenging trips. It’s important to take it slow. It can take several months for your body and mind to become accustomed to the varied terrain as you develop skills to glide over the trail and learn about what levels of fuel and water your body needs. Going on a mountain bike skills course will help you become a better rider.
- Get advice from people with greater experience. Chat with experienced backcountry riders about how to load your bike to get the balance right, and also what additional things you’ll need to take for particular routes. Your local bike shop is a good place to start.
- It’s also a great idea to ride with others wherever possible as this will help you to learn little hints and tips from them. It also ensures that if something does go wrong others are around to help.
What if things change?
Considering the abilities of the group and ensuring the trip meets everyone’s expectations will mean you are less likely to get into a dangerous situation. However, circumstances can change while you’re out. Be prepared, know your limits and make smart decisions.
- Take your time. Backcountry mountain biking is about enjoying the ride and loving the scenery. Don’t rush it, savour it! Regularly take short breaks to refuel, hydrate and check in to see how everyone’s doing.
- Stay together. Keep everyone in sight if possible. It may help to have the slower members towards the front to set the pace, and the most experienced person at the back to ensure no one is left behind on their own.
- Stay alert to your surroundings. Ask yourself, is anything changing? Are people starting to get cold, wet or overheated as the weather changes? Do you still know where you are and where you’re going? That way you can take early action if you need to, like turning back, picking a different route or finding shelter.
- Avoid crossing rivers if you’re not experienced, select tracks that use bridges to avoid crossing rivers. Remember, if the circumstances change you can always alter your plans by turning back, picking a different route or by finding shelter.
5. Take sufficient supplies
Any backcountry trip requires some thoughtful planning around what to take, and what you can leave behind. There is a big difference between riding in a mountain bike park or local trail and back country riding. The biggest difference is obviously the distance and potential isolation from help. This means that each rider must bring sufficient supplies as well as tools and equipment to survive any emergency.
Have your bike checked by a mechanic
There are more than enough opportunities for damage on a long trip, don’t start out with problems! You will also need to know how to change a tyre and patch a tube, as well as other field repairs you may need to do. There are plenty of people who are more than happy to teach you how. Start by asking at your local Torpedo7 bike shop.
What do you eat and drink?
Planning good nutrition and fuelling for your adventure is very important. Running out of food and energy can lead to simple mistakes being made that might have bigger consequences. Always take more than you think you’ll need. Take at least 2 litres of water with you. Consider where you can refill and add electrolytes for longer rides.
How do you pack it all?
A bike gives you an alternative option to carrying everything on your back. You want to remove as much weight as possible from your back and shift this to your bike. Packing can be challenging, especially for an overnight trip. It’s a little different than packing a backpack for a tramp. Not only do you have a bike to ride on, but you also don’t want to add too much weight and bulk to the bike as you’ll find it hard to pedal and keep your balance. There are various different options for carrying gear on your bike, head to your local bike shop and chat to the experts for more details on what’s available.
Have a great ride, but make it home
This resource is intended to help people gain enjoyment and be challenged safely in the outdoors. However, individuals must take responsibility for their own safety to ensure safe participation in the outdoors. Please share with your family, friends and mountain biking groups to help them plan their trip and make it home.
Published by: New Zealand Mountain Safety Council
www.mountainsafety.org.nz
Enquiries: [email protected]


