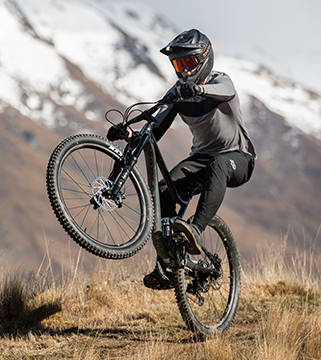


Giant NZ Gravity Team member Cameron Cole
Over the next week we’ll be featuring a series of bike setup tips and advice from professional downhill racer and former Junior UCI Downhill Mountain Bike World Championship winner Cam Cole. With multiple World Cup podiums to his name along with New Zealand Downhill National Championship titles and two Oceania Downhill Championship titles, we’re excited to tap into this wealth of knowledge and bring you the understanding needed to get the most out of your bike on the trail. Part 1 of 3 deals with an intro to basic setup and covers proper setup of your rear suspension. For Part 2 on setting your fork sag click here and for Part 3 on dynamic balance click here…
Bike Setup to build confidence on all trail types
Intro
Being able to ride a bike to the best of your ability, whatever that ability, requires a well set-up bike. There is a lot of basic information out there. However, there are many variables that contribute to how a rider feels on their bike and what each rider needs from their own specific set up. Simply, there is no substitute for taking the time to try new things and experiment on your own with the adjustments your bike has to offer, I’m not just talking about the compression on your forks alone. A comfortable bike set up that works well for you makes it easier to go fast, gives you confidence and will help you adapt to changing trail conditions, it may also accelerate the rate at which you improve your skills if you are a beginner or find the vital seconds you need to reach your competitive goals. This post aims to equip you with some of the tools that I have learnt in order to compete consistently at a world-class level.
Fore Notes to Begin
The points of contact that your body has with the bike i.e. pedals, through shoes and grips, through gloves (or not) are vital in being able to feel what is going on underneath you. If you are keen and willing to experiment with bike set up, first take a look at and have a think about how those items translate to what you are feeling while riding the bike. Imagine trying to drive a car from a waterbed? Then think about a formula one car and how the seat hugs the shape of the driver and is made of firm material, the driver’s steering wheel is hard and the gloves thin, the pedals are hard and the boots tight and thin. The driver can basically feel the tyres meet the road. The feedback they get from being able to feel the road can be converted into set up changes that give the driver more and more confidence. If you are interested in performance increases on your bike every element should be considered.
-
Shoes and Pedals
Whether you are on flat or clip less pedals you should aim to be in shoes that support the arches of your feet well so that your weight is well supported and distributed through the shoe and out on to the pedal. This will help get your body weight out into your bike evenly and prevent any foot or lower leg injuries as well as assisting with comfort on longer rides. If using flat pedals, skate style shoes don’t offer the best support but have far superior pedal contact compared to trainers. There are specific flat pedal shoes for cycling, which are the best option as they offer support, bump absorption and increased grip on the pedal.
-
Gloves and Grips
A pair of gloves with a nice thin palm will also help you distinguish between positive and negative feedback you will be getting from the bike. A set of firm and solid grips that don’t slip on the bar will add to the secure feeling. If your grips are uncomfortable you are probably holding on too tight.
Sag
Suspension sag is the amount of travel used on the bike while stationary and bearing the weight of the rider. Begin with sag as a starting point to make sure your spring rates are in the recommended ballpark. It is best to start out with the manufacturers recommendations. Some frame manufacturers and most suspension companies have a spring chart and ballpark figures for a starting point with spring rates, compression and rebound settings. A Google search for suspension products including make, model and year should get you there. At this stage getting the correct spring rate or air pressure is a vital step in the process and will make a huge difference in the final result. If further adjustments are made to set up beyond suspension it is a good idea to recheck sag once they have been made to ensure you are still on the right track.
Rear Sag
Before we run through the steps to find the correct rear suspension sag we would ideally like to check the rear swing arm. This includes all of its components and shock eyelet bushes so that we can make sure the whole system is moving freely without any excessive friction in all of the moving parts. If any linkage bolts are damaged or bent and bearings are excessively rough, you should replace those first.
Coil Shocks
- First you will need to measure the eye-to-eye (Figure 1. (A)) length of the shock fully extended. You can perform this measurement with the shock in the bike as it sits.
- On flat ground the second step is to sit on the bike up against a wall or have a friend hold you up. Bounce up and down a couple of times so that the shock shaft can settle into its travel at the point of sag. Take the eye-to eye measurement again (Fig 1. (A)).
- Calculate the percentage of sag from the two measurements you have made. You will need to know the stroke of the shock (Fig 1. (B))
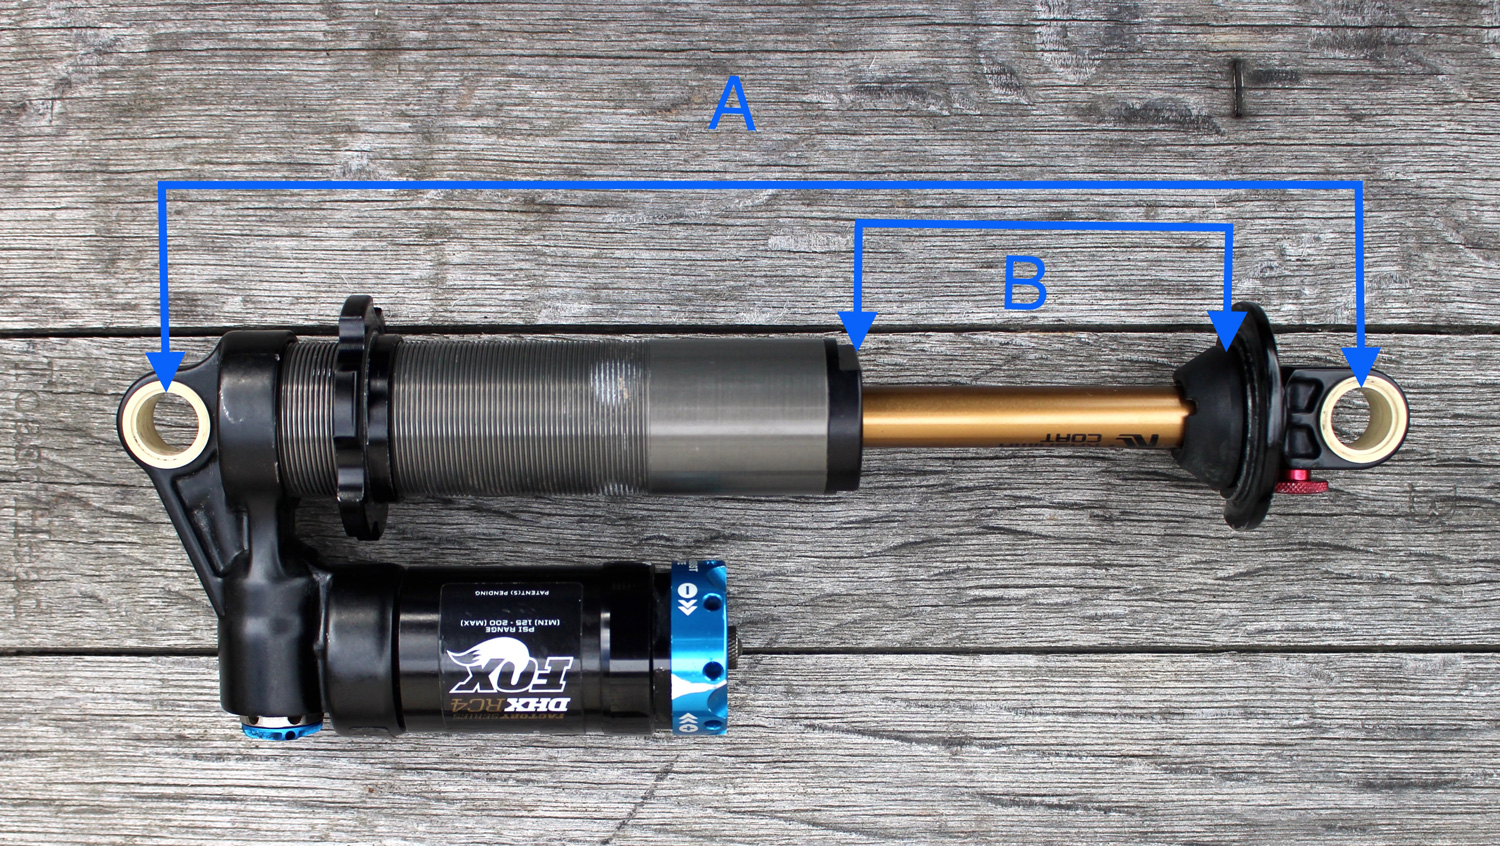
Example – A shock is 240mm eye to eye. With a rider on the bike it is 225mm eye to eye and there is 76mm of available shaft stroke.
Sag = 240 – 219 = 21mm
21/76 = 0.28
0.28 x 100 = 28%
For downhill bikes, around 20-35% sag is good depending on the linkage design and the course (this will be explained in the dynamic balance section).
Air Shocks
- Ensure that any lock out style lever adjuster is set to open. On flat ground sit on the bike up against a wall or have someone hold you up. Bounce up and down a couple of times so that the shock shaft can settle into its travel at the point of sag. Pull the rubber sag indicator O-ring up to the face of the shock seal; most modern air shocks have these on the shock shaft if not install a temporary zip tie. Gently get off the bike making sure the shock doesn’t move the O-ring any further down the shock shaft.
- Measure the entire length of available travel on the shock shaft (lip of the shock seal on the main body to the opposite end of the shaft), then measure from the lip of the shock seal to the sag indicator O-ring. Calculate the percentage of sag. Amount of sag/overall shock shaft travel (stroke) = ANSWER X100 = % of sag
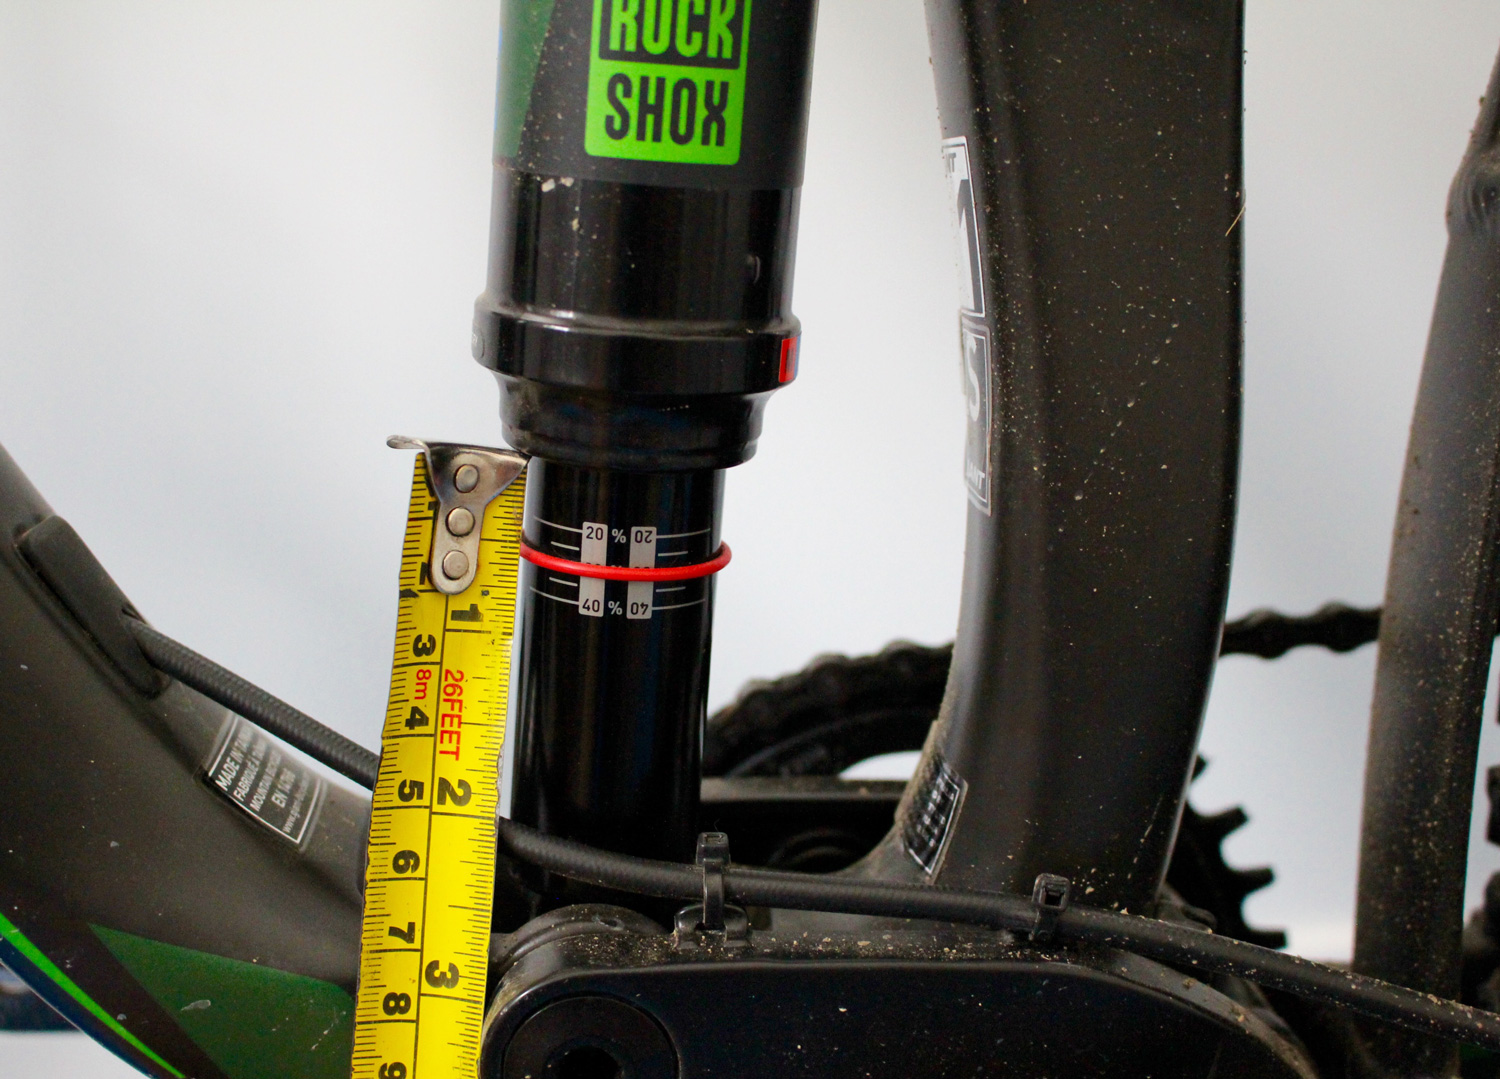
Most air shocks on bikes with 120-160mm travel should have 25-30% sag. 25% is on the firmer side and 30% is on the plusher side.


