


Giant NZ Gravity Team member Cameron Cole
We’re stoked to be featuring a series of bike setup tips and advice from professional downhill racer and former Junior UCI Downhill Mountain Bike World Championship winner Cam Cole. With multiple World Cup podiums to his name along with New Zealand Downhill National Championship titles and two Oceania Downhill Championship titles, we’re excited to tap into this wealth of knowledge and bring you the understanding needed to get the most out of your bike on the trail. Part 2 of 3 deals with fork and cockpit setup. To read Part 1 on setting your rear suspension click here or Part 3 on Dynamic Balance here…
Setting Fork Sag
The method to measure sag in the front is basically the same as for the rear, but again it is important to ensure the suspension is working, as it should. Any excessive stickiness by way of worn parts, dirty seals or a lack of internal lubrication may give you false results. A lack of internal lubrication may also have an effect on the characteristics of the fork as variations on oil volume can change the dynamics of the fork in some models. In other models where it is a closed system, air inside the cartridge may have a negative affect on performance. Take your fork into your local store and they can arrange an inspection and over haul if need be. There is no compromise when it comes to a regularly and properly serviced fork. If the fork has a climb or lock out style compression function, make sure this is set to open, unlocked or soft.
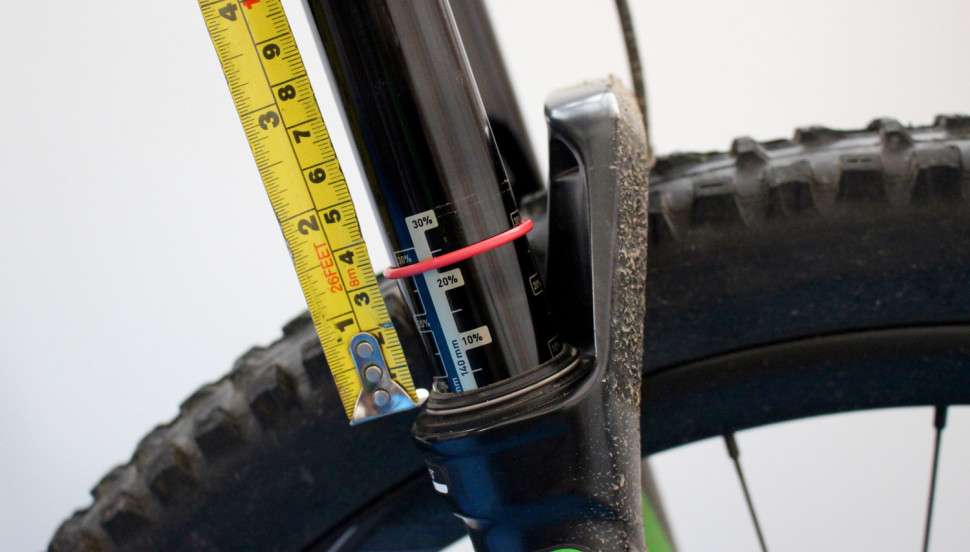
- Make sure your fork has an O-ring or zip tie on the stanchion. You will use this to take the measurement; it is also handy to keep an eye on the amount of travel you are using on different trails and to ensure your fork is functioning, as it should.
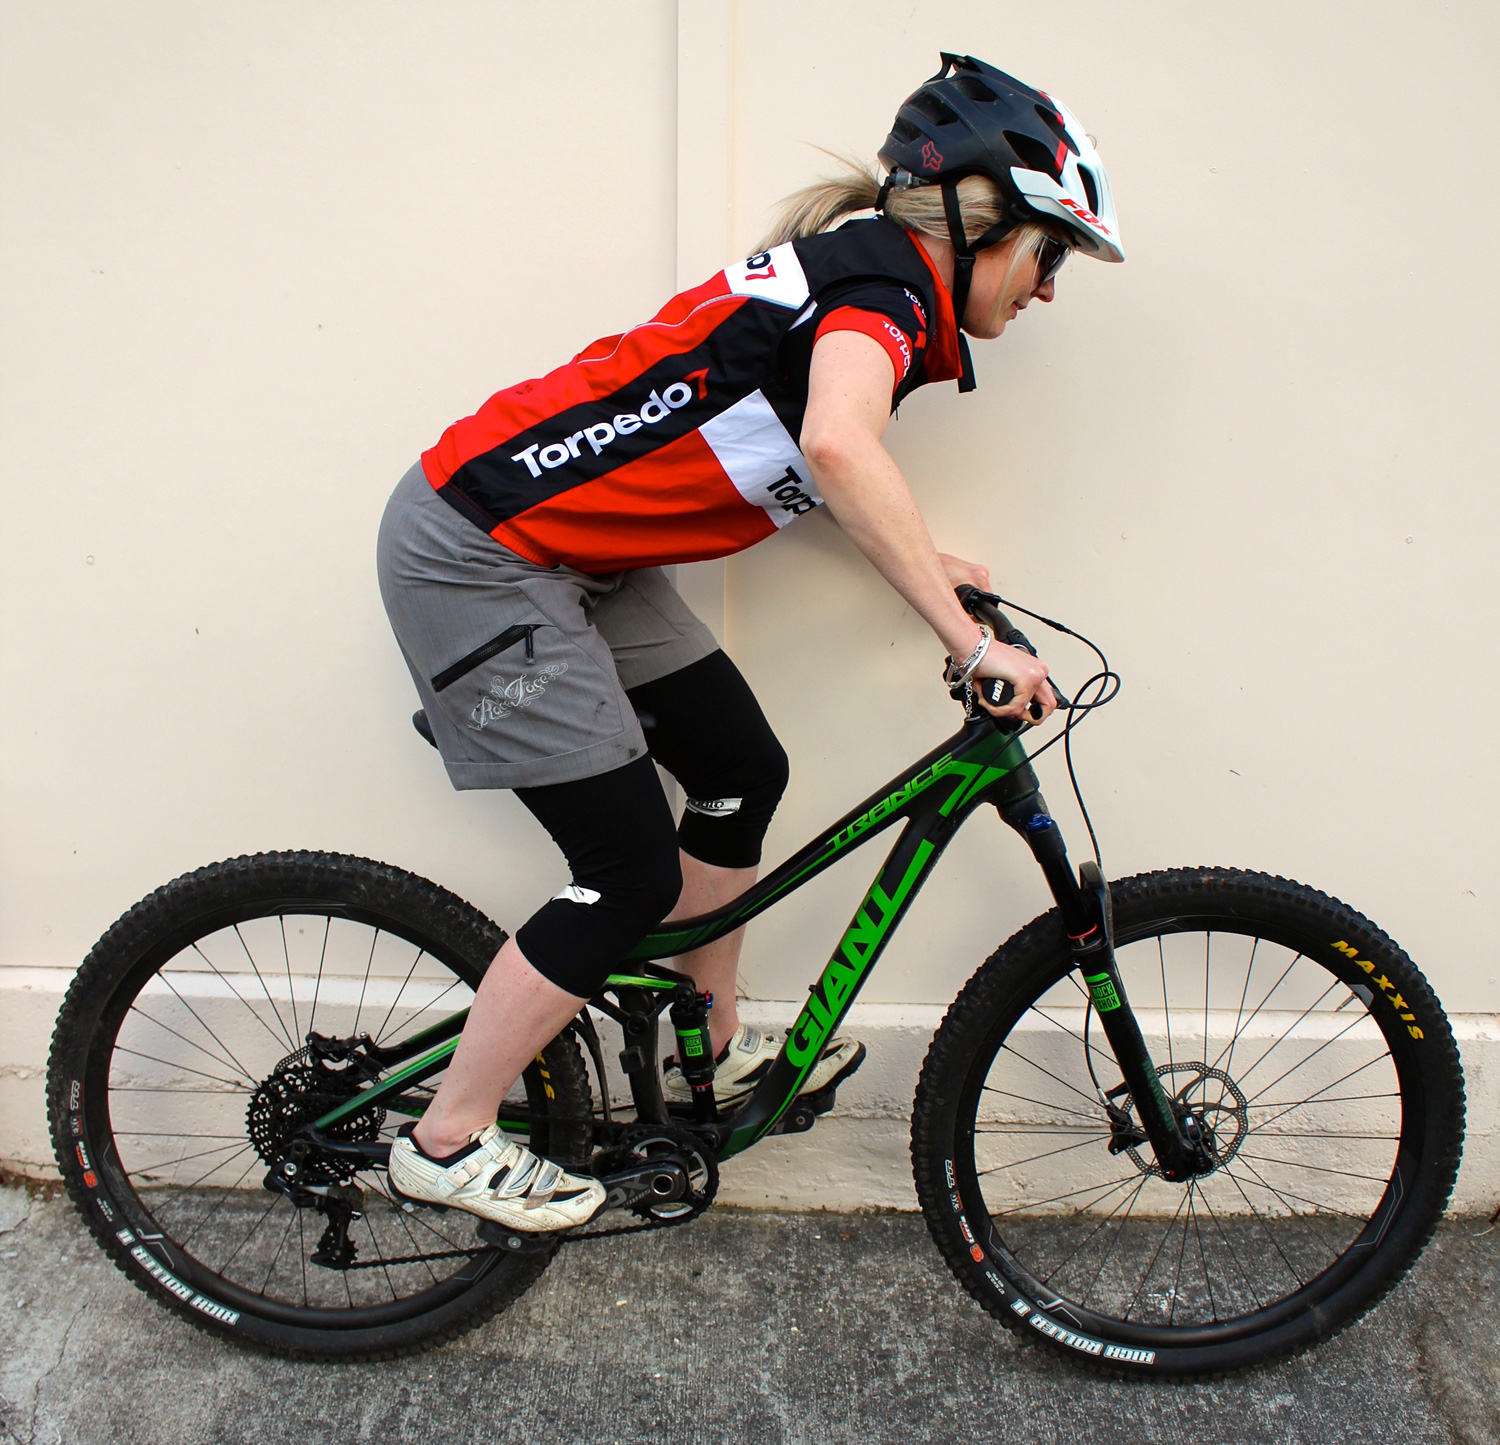
Stand on the bike up against a wall or with a friend holding you up. Bounce on the bike a couple of times so the fork can settle into its travel at the point of sag. Finish standing roughly in your riding position (weight through your feet).
- Keeping the fork at its point of sag, slide the O-ring or zip tie down against the fork dust wiper and gently get off the bike, make sure you don’t move the O-ring any further up the stanchion than your point of sag.
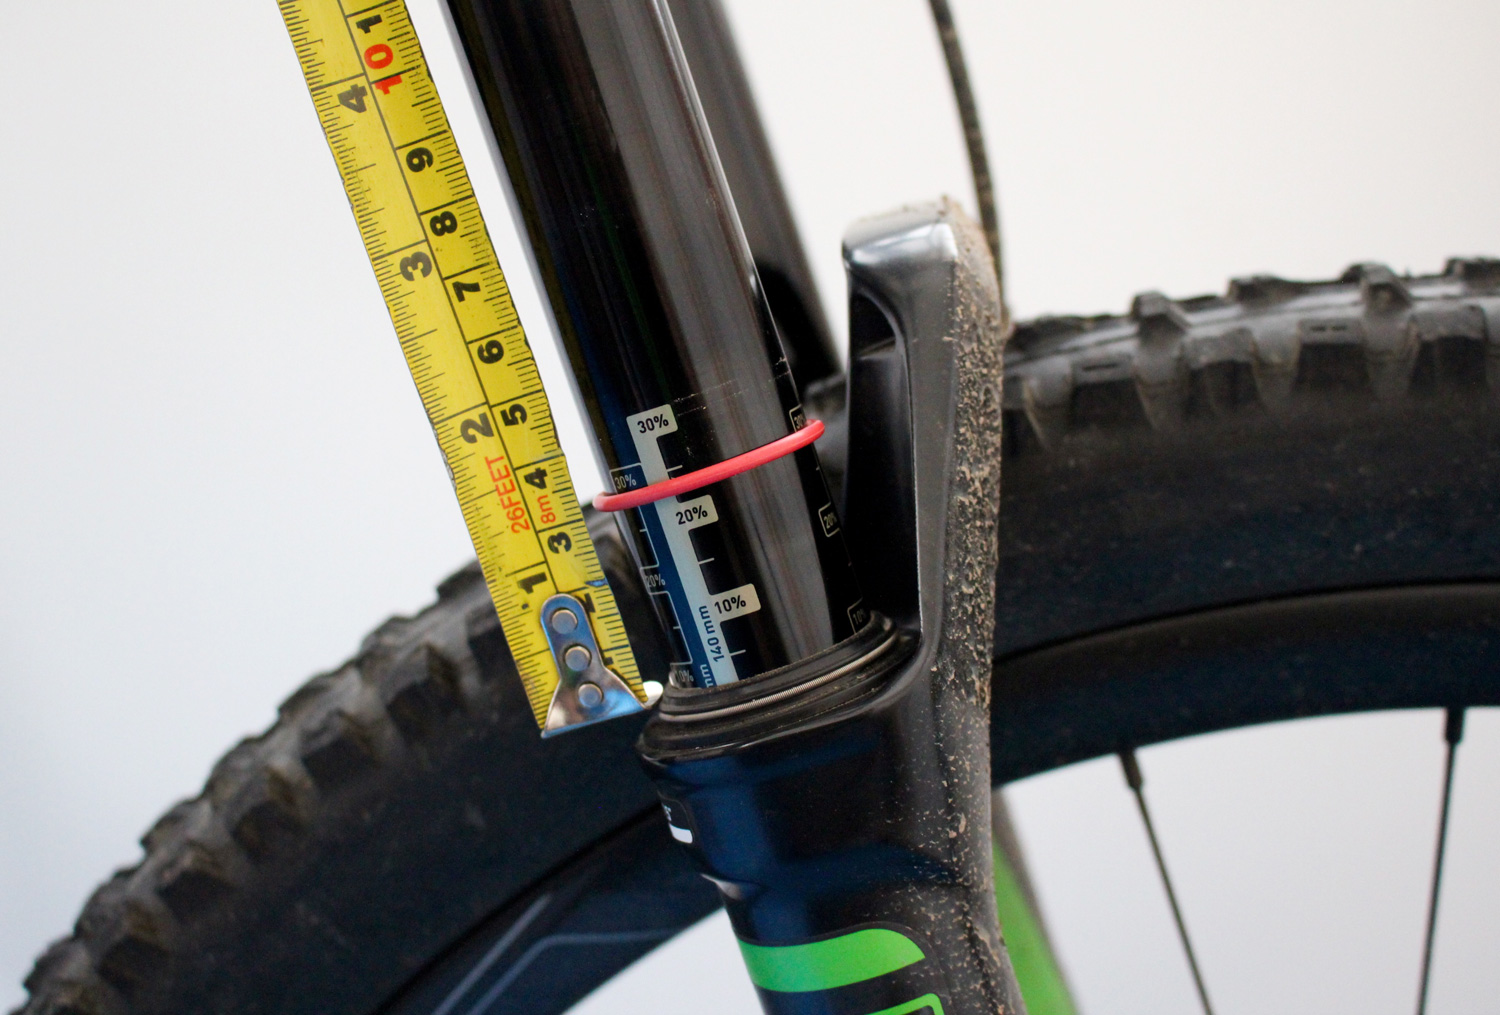
- Measure the gap from the seal to the O-ring or zip tie.
On a 200mm downhill fork I would recommend about 25-44mm or 13-22% sag. If you have an air spring fork simply adjust to reach the correct numbers. If you have a coil spring fork and you are way over the recommended sag do not try to reach the correct numbers by increasing spring preload alone. This will only affect the ride height; the spring rate will still be too soft and the suspension won’t carry your weight properly. See the manufacturers web site for alternate spring rates and order the correct one in store.
On a single crown fork you should have 15-22% sag. In the same fashion as the shock, 15% is on the firmer side and 22% is on the plusher side. This range can help you fine-tune your suspension balance front to rear for flatter or steeper terrain and faster or slower trail conditions.
Cockpit set up
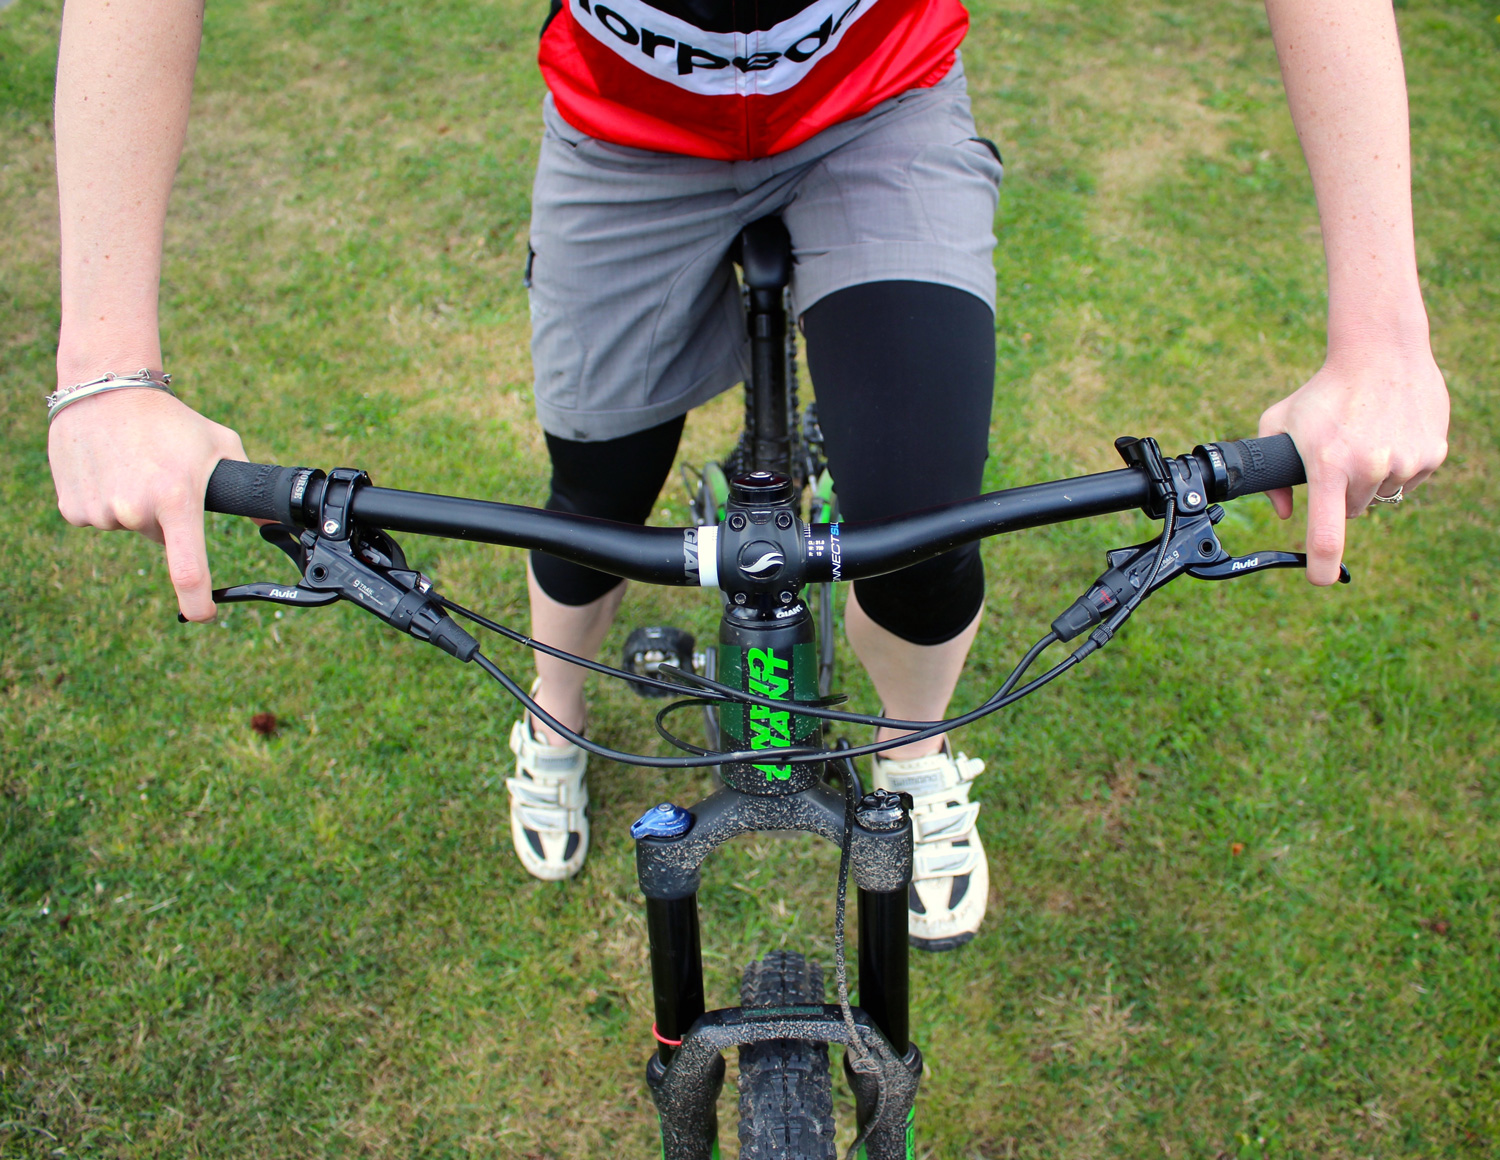
Handle bar height, cockpit length and control placement are the next items that require attention. These adjustments create the foundation for body position while having some affect on major set up components.
- There are many benefits to sufficiently wide handle bars. Basically they offer more control and stability. (read more in our handlebar blog here)
- As a general rule you should aim to have your forearm parallel with the bikes direction.
- You should be able to comfortably reach the blades of your brake levers with one finger. Most brakes have several adjustments, which make this relatively easy in this day and age. Familiarize your self with the adjustments. If you are not already one finger breaking with your index finger, you should be able to achieve this with a small amount of practice.
- You should be able to reach all of the controls on the handlebars including dropper post and shifters.
- The angle at which the brakes and shifters sit can be adjusted to aid getting your upper body in the correct riding position (Elbows up and bent, as in the images below)
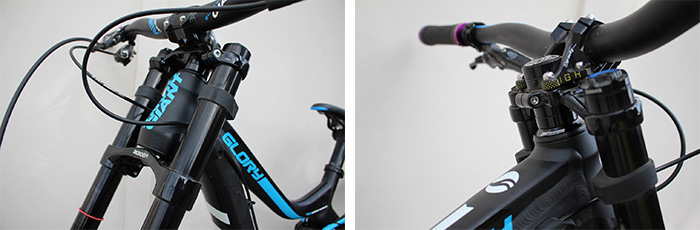
The steps highlighted below draw attention to the arrangement of the spacers above and below your stem. For triple clamp forks, this is your bottom clamp/fork crown height on the stanchion legs and the spacer arrangement above and below the top clamp.
1A. Downhill and Triple clamp forks only
Variations on spacer arrangement and clamp position on triple clamp forks will affect how the weight from your feet is transferred to the wheels of the bike, in particular the front wheel and to some extent the head angle of your bike. On all brands of fork there will be a maximum and minimum adjustable height where either one or both of the crowns can sit on the stanchion’s, check the user manual of the fork to confirm these positions. Work with-in these limitations (if any) to reach your desired head angle, weight balance and bar height. Ignoring the influence of suspension sag, basically the higher you go the less directly your weight is exerted into the front tyre through the frame, additionally you may gain extra stability for braking.
1B. Trail bike – adjustments that affect head angle
For bikes with single crown forks the only way you can affect any of these results is to change fork travel +/- 10mm or with an angle set (headset) that opens or closes the head angle.
2. Stem and spacer arrangement
Moving up to the spacer arrangement. This will contribute most to your overall bar height. Restrictions on these adjustments may include the length of the forks steerer tube, your frames head tube height, type of stem and for triple clamp forks the amount of stanchion you have left. You can drop or raise the bar height by moving the spacers to either the top or bottom side of the stem or top crown on your steerer tube.
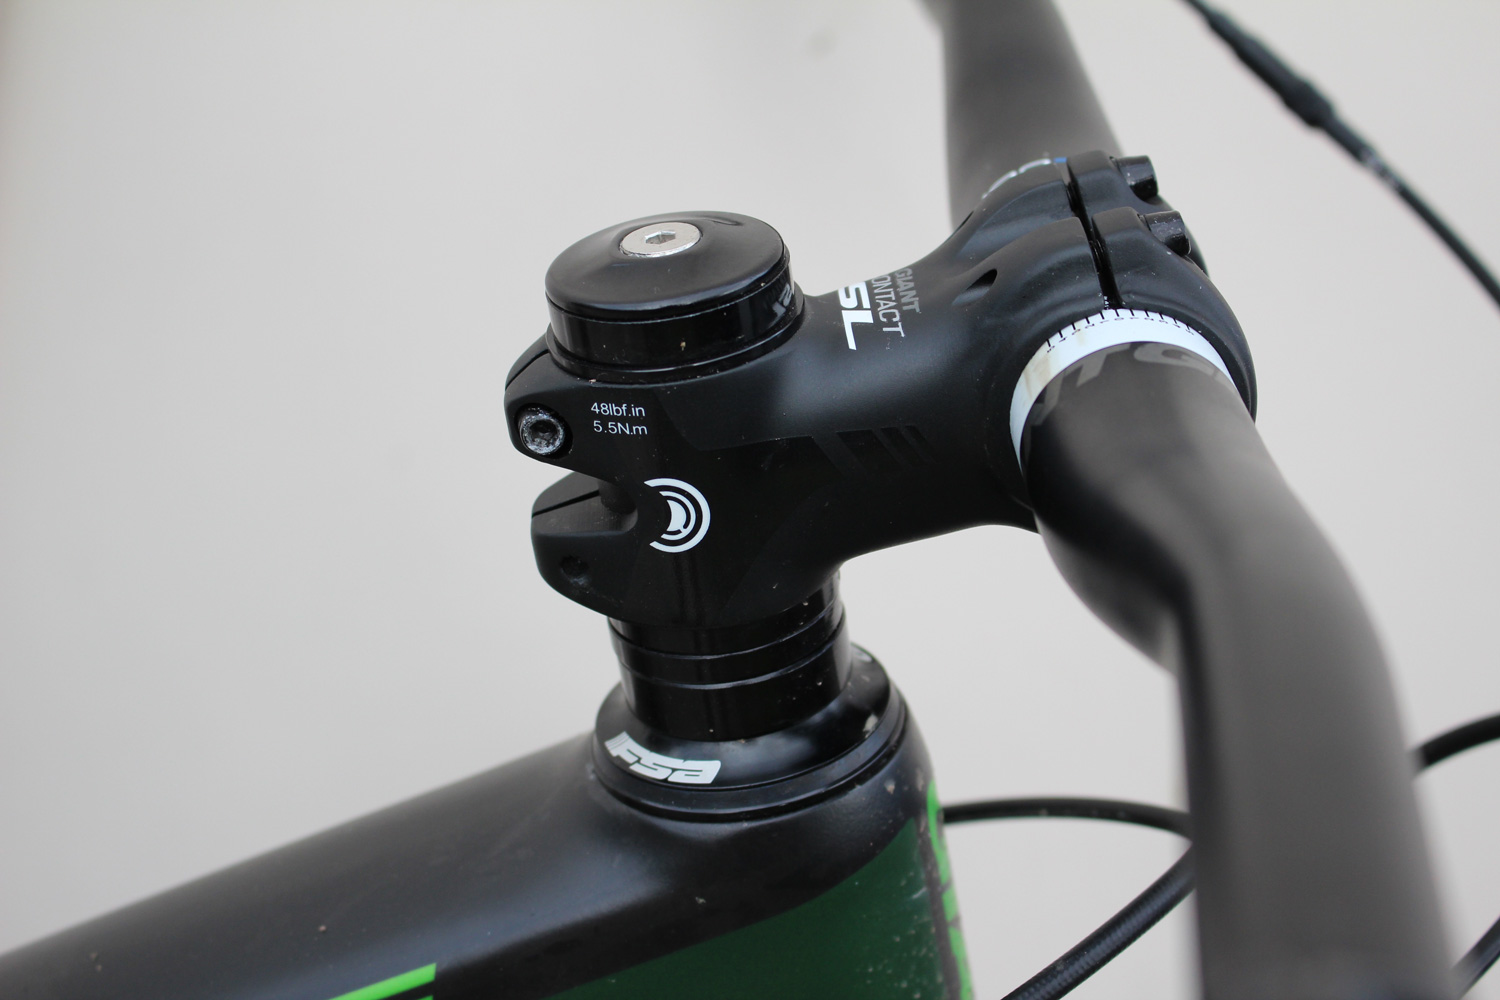
Your bar height should help you feel comfortable and stable at speed but also remain low enough so you maintain weight on the front tyre. Adjustments in suspension spring rate will also affect the height of the bars in relation to your feet so beware of any drastic changes you make in that area. You may find you will need to readjust the suspension balance through sag to match the new bar height. Correct bar height will also assist in giving you a solid riding position (heels down, strong through the legs, back flat, elbows bent and up, chin up and looking ahead – see image below). Finding a comfortable bar height will take some time and additional fine-tuning to get right. Fine-tune on the trail between runs or sections so you can feel the difference between alternatives, back to back.