Backcountry Ski Touring/Splitboarding Checklist:
If you are venturing away from the inbounds area on a ski field, you need to be prepared. There is no ski patrol to help if things go wrong. If a member of your party is unfortunate enough to be completely buried in an avalanche then you rescuing them very quickly is their only hope. So pre-planning and self-sufficiency is vitally important. You will also be exposed for longer to a wider range of temperatures so just wearing your usual snow clothing that you wear at the skifield is not going to be ideal. Much like tramping, you will need to layer up and strip down through the day as exertion levels and the conditions vary and you have to carry everything with you, both up and down. The following checklist is a reminder of what you typically need for a day out ski-touring (or split-boarding) with a few tips thrown in, but please be aware that this checklist is no substitute for professional training in backcountry awareness. There are many options available to get schooled on what you (and equally importantly, your trip buddies) need to know. You also have the option of guided trips until you get the knowledge and experience required to be safe.
Day tour checklist:
Do you have….
- Avalanche awareness – if you cannot answer this with a definite YES! then check out the New Zealand Avalache Centre website (www.avalanche.net.nz) run by the Mountain Safety Council to get schooled on what you need to know. Specifically a great quick start is their Online Intro Course at http://avalanche.net.nz/education/Online-Avalanche-Course/Intro.asp.
- A buddy to go with – all of the below equipment is irrelevant if you don’t have someone to locate you and dig you out very quickly if you are unfortunate enough to be completely buried in an avalanche. They need know how to perform an avalanche rescue quickly and ideally you should have practiced avalanche rescue together to confirm you are both proficient. You don’t want to be looking down a perfect pitch of snow and have a niggling doubt in the back of your mind that if you have underestimated the avalanche risk and get caught out, you don’t have a buddy who has a chance to find you and dig you out in time.
- Avalanche transceiver – this continuously transmits a signal which allows your buddy to locate you with by switching their avalanche transceiver into receive mode. Sounds simple, but avalanche search requires training and practice to allow you to locate someone as quickly as possible if they are buried.
- Avalanche probe – the transceiver gets you close, but to pinpoint the victim and so be able to dig directly to them in the minimum time, you use the probe to, well, probe for them.
- Avalanche shovel – a lightweight but strong alloy shovel for quickly digging down to uncover an avalanche victim. Digging with your hands is not an option when time is of the essence. Don’t skimp here, avalanche rubble can be very tough to dig through and most plastic bladed shovels are just not up to the task.
- Communication options – at the very least a mobile phone to call for help (AFTER you have dug out any avalanche victims). Though you may not have coverage at the accident site, it may save you having to get all the way back to civilization to get more help if required. An EPIRB/emergency beacon is a great option to carry and you can hire these at very reasonable cost from outdoor stores, DoC offices and other providers.
- Ski touring or splitboarding setup – skis or a split board with bindings designed to allow you to climb efficiently on your ski/board which then switch into downhill mode for the ride down. This all gets pretty techo so if you don’t know what this means, contact us for advice.
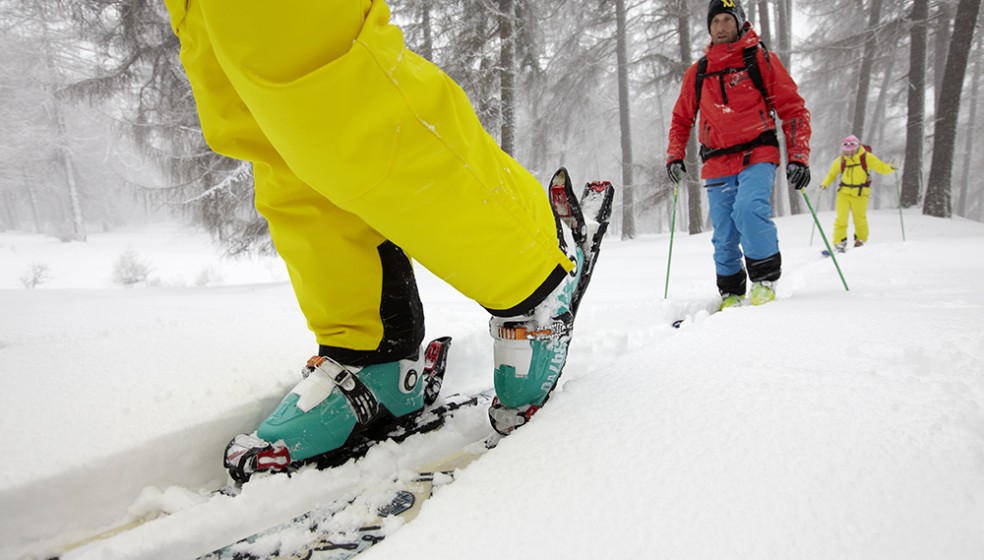
- Ski touring boots – alpine ski boots are uncomfortable to walk in. Ski touring boots have a cuff which releases for the climb up. Not applicable if you are a boarder.
- Climbing skins – Climbing skins are what allow you to ascend up snow slopes far more efficiently than booting it. Easy to forget (everyone eventually has a ski tour day where someone forgot their skins, especially if they had hung them out to dry after a recent trip) so worth double checking they are packed before leaving home.
- Ski crampons – these are optional on fresh powder days, but in springtime they may allow you to ascend firm, crusty slopes that have frozen overnight that you would otherwise not be able to skin up and have to walk instead. If this crust is super hard and you can’t get reliable purchase in boots, then don’t proceed unless you have boot crampons and an ice-axe, and the knowledge to use them. A long slide on hard crust may be life-threatening, especially so if the runout is over a cliff or into rocks. Snowboard boots are notoriously poor at ascending hard crust slopes so crampons are an important consideration here.
- Adjustable ski poles – for going up, you usually want the ski poles a bit longer for extra climbing support than you would like when going back down. If on a split-board you need to collapse them down to put on your pack before boarding down.
- Shell jacket – If there is no precip in the forecast you can leave your heavy and bulky waterproof snowjacket out the pack, but a windproof outer layer with a hood is critical as any breeze will amplify the cold many times when you are on exposed snow slopes. Lightly insulated soft shell jackets are a great option, being windproof and snow resistant.
- Snow pants that have venting options or are very breathable – when you have to walk uphill things get overheated pretty quick if you are in your usual insulated ski pants you use riding the ski lifts. Breathability is key to dump the heat and water vapour generated by your legs working hard when you climb. Lightly insulated softshell pants are a good option, as are uninsulated waterproof pants with multiple vents over lightweight merino leggings.
- Mid layers – take the appropriate amount for the weather and a bit extra in case of emergency or being out longer than you planned. A compact down or synthetic jacket is a great emergency piece, giving lots of warmth which takes very little space and weight in the pack.
- Lunch, energy snacks and water – more than for a ski field day, to fuel you for the climbs up, no lifts or cafe out here.
- Compact first aid kit – remember there’s no ski patrol nearby.
- Sunscreen – expect to be getting up a sweat on the climb up so you will probably strip down and be more exposed than you would on a day skiing lifts.
- Sunglasses – goggles fog up and are hot to wear on the climb. You have to protect your eyes to avoid snowblindness so effective sunglasses must be on your face when goggles are not. Goggles are still good for the ski down, especially if you are a contact lens wearer. Consider taking your snow helmet also though you should ski/board conservatively when in the backcountry – remember, no ski patrol.
- Sunhat – that beanie or helmet is going to be coming off after the first 100 metres of climbing. A hat helps protect from sunburn.
- A buff or scarf – can be used to protect the neck, chin, ears and nose from sun, wind and cold allowing you to fine tune your protection from the elements.
- Pack for above – any appropriately sized daypack will do, though touring specific packs are designed to allow quick access to your avalanche rescue gear.
Please contact any of our stores if you have any questions on the above. Our staff are knowledgeable on all things outdoor and many are keen backcountry skiers or snowboarders.
See you out there!
Ed Liddle
Dunedin


