


Ever been stuck with a puncture? This article explains the process for repairing a punctured bike tube with a patch kit.
If you want to fix your flat tyre by simply replacing the punctured tube with a new one, follow steps 1-3, then jump forward and complete step 5 after this skip to step 10 and complete all remaining steps.
Tools required:
Set of Tyre Levers (2 or 3)
Puncture Repair kit or new tube
You may also need: 15mm Wrench for nut type axles.
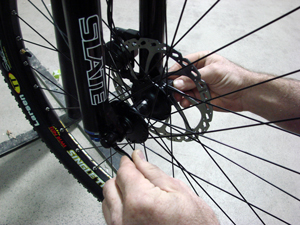
Image 1
1. It’s easiest to remove the wheel from the bike before attempting to fix the puncture. For quick release type wheels, simply pull the lever out and un-screw the nut on the opposite end until loose enough to remove the wheel from the bike. Depending on if you have V-brakes you will need to disconnect these before you remove the wheel.

Image 2
2. Engage one tyre lever under the bead of the tyre.
Engage a second lever 1-2″ (25-50mm) from first lever then pull both levers toward spokes to lift bead off rim. (Image 2)
Disengage one lever. Move it two inches (50mm) along the rim and engage lever in the bead.
Pull lever to lift next section of bead off rim and run it all the way around the tyre until that side is off the rim.
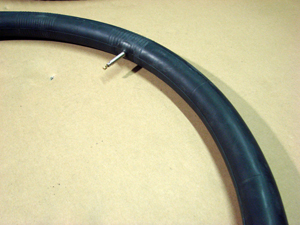
Image 3
3. Remove the tube out from inside the tyre. (Image 3)
Pump the tube up and inspect it for an air leak. The best way to do this is by placing the inflated tube in a bucket of water and check for bubbles appearing in the water.

Image 4
4. Once you have located the puncture point in the tube, mark it with a circle using a crayon or pen. (Image 4)
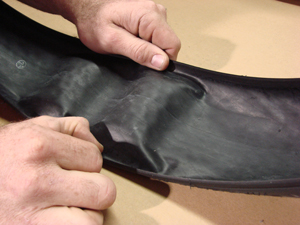
Image 5
5. Remove the remaining side of the tyre off the rim, so it comes completely away from the wheel.
Spread the tyre open and inspect the entire inside surface for any sharp objects stuck in the tyre that may have caused the puncture. (Image 5)
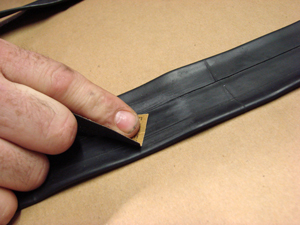
Image 6
6. Using the abrasive material in the Puncture Repair Kit, roughen the area around and over the puncture point. This helps the patch and glue adhere properly to the tube. (Image 6)

Image 7
7. Using the glue supplied in the Repair Kit, apply a generous amount to the area around and over the hole in the tube. Make sure there is a big enough area of glue for the size of the patch. (Image 7)
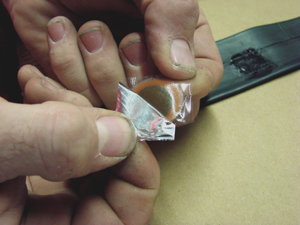
Image 8
8. Peel the foil backing off the patch before applying (Image 8). It is important to leave the glue for a few minutes until it goes slightly sticky before placing the patch on the tube.
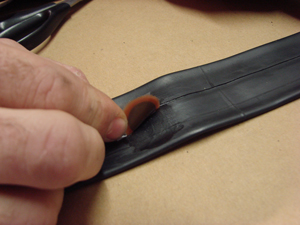
Image 9
9. Check that there is glue beneath the entire surface area of the patch. Place it down onto the tube. (Image 9)
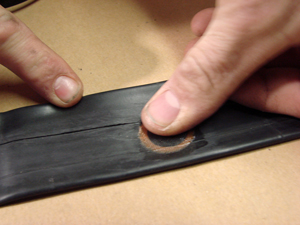
Image 10
10. Press the patch down firmly on the tube with your fingers and hold for a minute to allow the glue to cure (Image 10). Once the patch has settled, gently peel the plastic backing off the patch.

Image 11
11. Reinstall one side of the tyre on the rim.
Starting with the valve first, insert the tube up inside the tyre (Image 11). Partially inflate the tube before you begin to make it easier to install.

Image 12
12. Once the tube has been completely tucked up inside the tyre, work the remaining side of the tyre back onto the rim. Start at the valve and work away from it using your thumbs. (Image 12)
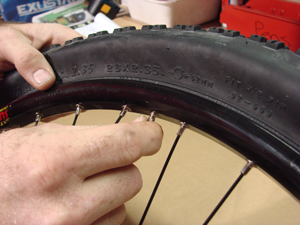
Image 13
13. Once the tyre is completely on the rim, check the valve is correctly positioned by pushing it up inside the tyre. Then pull the valve down again and wind the valve locking nut down until tight (Presta valves only).
14. Re-inflate your tyre and remember to tighten the quick release before riding again.
AUTHOR

Danielle Conwell
Marketing - Torpedo7